Midwest Coupon Clippers

Cudding Coupons and Saving You Some Moolah

  • Home
  • Coupons
    • Newest Coupons
    • Coupons.com
    • Red Plum
    • Smart Source
    • Hopster
    • Saving Star
    • Coupon Database
  • Deals
    • Amazon
    • eBates
  • Freebies
  • Sweeps & Giveaways
  • Store Match-ups
    • Midwest Matchups
      • Copps/Pick n’ Save
      • Festival
      • Menards
      • Piggly Wiggly
    • Nationwide Matchups
      • CVS
      • Dollar Stores
        • Dollar General
        • Dollar Tree
        • Family Dollar
      • Target
      • Walgreens
      • Wal-Mart
  • This & That
    • Recipes
    • Around the House
    • Money Saving Tips
    • Get Organized
    • Disney
    • Pets
    • Gardening
  • About
    • Contact
    • Disclosure

Impossibly Easy Coconut Pie

May 13, 2020 By Leah Leave a Comment

Impossibly Easy Coconut Pie

Using ONLY your blender turn a few ingredients into an AMAZING pie!  and, GUESS WHAT?? No rolling out pastry dough!  Like magic, the ingredients settle perfectly as it bakes; creating a crust, delicious custard filling, and golden coconut top!

This takes less than 5 minutes to mix up and will not disappoint in flavor!

📍 Pin HERE for later!

What you need:

  • 1 (14-ounce) can Sweetened Condensed Milk (NOT evaporated milk)
  • 1 ½ c. water
  • 1/3 c. biscuit baking mix (Gluten Free Works, Also)
  • 3 eggs
  • 1/4 c. butter, softened
  • 1 ½ tsp. vanilla extract
  • 1 c. flaked sweetened coconut + addition for sprinkling on top

Make it:

  1. Preheat oven to 350°.
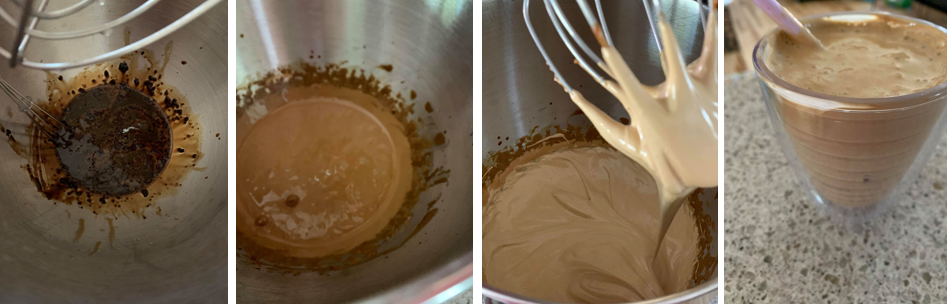
  2. In blender bowl, combine all ingredients.
  3. Blend on high speed 3 minutes.
  4. Pour into greased 9 ½ or 10 in Pie Pan; let stand 5 minutes.
  5. Sprinkle with additional coconut.
  6. Carefully place in oven (I prefer to place on a baking sheet so it is easier to put in and out of the oven)
  7. Bake 40 – 45 minutes or until knife inserted near edge comes out clean and pie is set.  It will still slightly jiggle in the pan but is no longer liquid.

Serve cool, with whipped cream if desired.

Refrigerate any leftovers!

Filed Under: Featured, Recipes, Uncategorized

Copycat Theme Park Churro Bites

May 5, 2020 By Leah Leave a Comment

Since the Parks are closed, why not bring a little of the magic to your own kitchen?  Disney has released several of their TOP SECRET recipes to the public to keep us all feeling like we can bring a bit of the parks home, even when we can’t visit!  We gave the Churro Bites a whirl and boy, they did not disappoint!

Don’t let the steps fool you, this is REALLY easy to make and comes together in snap! The chocolate dipping sauce is totally optional but adds a fun component and helps this feel extra special!

📍 Pin HERE for Later!

What you need:

  • 1 c. water
  • 8 Tbsp. Butter (1 stick)
  • 1/4 tsp. salt
  • 3/4 tsp. ground cinnamon, divided
  • 1 1/4 cups all-purpose flour
  • 3 eggs
  • 1/2 cup sugar
  • Oil for Frying

Make them:

  1. Combine water, butter, salt, and ¼ teaspoon cinnamon a sauce pan over medium heat.  Bring to a rolling boil.
  2. Reduce heat to low.
  3. Add flour & stir vigorously until mix forms a ball. Remove from heat & let rest for 5-7 minutes
  4. Add eggs, one at a time, and stir until well combined (optional use a stand mixer for this step, its a game changer!)
  5. Mix sugar and remaining ½ teaspoon cinnamon in medium bowl.
  6. Using caution, heat about 2 cups of oil in medium skillet or 1-quart saucepan over medium-high heat or until temperature reaches 350˚.
  7. Fill a large piping bag or zip top bag fitted with large star tip.
  8. Pipe 1-inch strips of dough over saucepan, cut with knife, and drop into hot oil. Repeat until churro bites fill saucepan with room to fry.
  9. Fry churro bites until golden brown (approximately 5 minutes). Remove with slotted spoon or mesh spider strainer and lay on paper towel to drain.
  10. While still warm toss in churro bites until coated.
  11. Place on serving plate and serve with favorite dipping sauce.

Note: No piping bag or tips?  Simply put in a ziptop bag and snip off a corner.  You won’t have the traditional little grooves, but will fry and taste exactly the same!

Chocolate Dipping Sauce

What you need:

  • 3/4 c. semisweet chocolate chips
  • 1/4 c. (1/2 stick) butter
  • 1/2 tsp. ground cinnamon
  • 2/3 c. granulated sugar
  • 2/3 c. evaporated milk

Make It:

  1. In a small saucepan combine the chocolate, butter, and cinnamon
  2. Over medium heat and cook, stirring often, until melted through.
  3. Stir in the sugar, and gradually stir in the evaporated milk.
  4. Bring to a boil, reduce heat, and simmer over low heat for 8 minutes, stirring constantly.
  5. Remove from heat, let cool slightly before serving with the churros for dipping.

Churro recipe found HERE from Disney Parks Blog

More delicious desserts to try:

Mini Cinnamon Sticky Rolls

Cherry Cheesecake Dip

Lemon Meltaway Cookies

Filed Under: Featured, Recipes

Copy Cat Chinese Take Out Red Sweet & Sour Sauce

April 27, 2020 By Leah Leave a Comment

Copy Cat Chinese Take Out Red Sweet & Sour Sauce

I am a SUCKER for Chinese Take Out!  Sweet & Sour Chicken and Crab Rangoons are forever my favorite carry out food!  For YEARS I have been trying to find a recipe to copy the bright red, sweet, tangy, and irresistible sauce that comes with Sweet & Sour Chicken and for dipping appetizers in.

Well it FINALLY happened! I found one and after a few tweaks, am AMAZED how good & spot on it is.  I never would have guessed that MARASCHINO CHERRY JUICE was the secret!  Not only does it have the recognizable red color, it is sweet, slightly sour, and perfect to pair with popcorn chicken & steamed rice to make your own take out!

Oh, and don’t forget the egg rolls and crab rangoons (I cheat and buy them from the freezer section)

Pin HERE for later!

What you need:

  • 1/2 c. white sugar
  • 1/3 c. white vinegar
  • 3/4 c. pineapple juice + about 1/2 c. of pineapple chunks from the can
  • 1/2 c. Maraschino Cherry juice (drain from a can)
  • 2 Tbsp. Ketchup
  • 3 Tbsp. corn starch
  • 1/4 c. water

Make it:

  • Combine all ingredients EXCEPT pineapple chunks, corn starch & water.
  • Bring to a boil over low heat
  • Combine corn starch & water until smooth
  • Once liquid is boiling, add corn starch and whisk until thickened.
  • Remove from heat and add pineapple chunks.
  • IF you wanted a less sweet sauce, add less sugar or more vinegar.
  • You can adjust the thickness also by adding more corn starch and water, even after adding the first round.  Just dissolve an additional TBSP of starch in water or pineapple juice.  Reboil the sauce, and stir in until desired consistency.

Note: IF you can find Maraschino Syrup this will work also.  Some large grocery chains carry in the ice cream sundae toppings area OR in the mixers area of the adult beverages department.

Crab Rangoon Dip Recipe

Super Simple Soft Pretzels

Filed Under: Featured, Recipes

Paper Plate Yard Memory

April 21, 2020 By Leah Leave a Comment

Paper Plate Yard Memory

Pin HERE for later!

Now that the weather seems to be cooperating better, we are outside all we can.  In the never ending battle to keep kids entertained and busy, we gave this yard game a try.

Needing NOTHING special to make the game pieces, this is ideal for throwing together in just a few minutes.  All you need are some paper plates and the ‘matching’ pair images.

For the game piece matches use anything you can imagine.  I chose to print off Disney Characters in pairs, cut out and then Elmer’s glue them down to the front/top side of the plates.  We ended up with 46 plates or 23 images to match.  No set number is needed, this was just what I somehow randomly printed off!

If you do not have a printer, go right in and draw your own images right onto the plates!  There are so many ideas you can do!  Think shapes, colors, letters, animals, cars, etc.!

After the game pieces are made, step outside and lay them out.  Make rows and columns and start turning over.  Everyone takes a turn finding matches!

Did the plates blow away?

  • No, they held pretty firm to the grass, but I used heaver Dixie Brand plates because that is what I have.  I think if there was a heavy wind or big gust, it would scatter!  I think cheaper plates would work well for this too, as long as you were fairly sheltered from wind or it was a calm day.

Were the kids interested?

  • Yes, very much so.  Using the Disney characters kept them very interested, but it was something different and highly interactive. We did several rounds before putting it away for another day.  Both kids asked to set it up the second day.

Where to Play?

  • This worked outside in our lawn perfectly, but also would be fun to take camping, at a hotel or Air B&B, Birthday Party, or spread out in your living room on a rainy day!

Ideas for plate matches:

  • Fruits & Veggies
  • Upper and Lower Case Letters
  • Shapes
  • Colors
  • Numbers
  • Animals


Filed Under: Family Savings, Featured, This & That

Preschool/Earlier Learner Busy Ideas

April 13, 2020 By Leah Leave a Comment

Disclaimer: This post contains affiliate links and we will be compensated if you make a purchase after clicking on our links. You can view MCC’s Full Disclosure Policy HERE.

Preschool/Earlier Learner Busy Ideas

Now that we have transitioned to e-learning and home based education, my day is filled with iPads, mechanical pencils, math worksheets, and PRESCHOOL CLASSROOM ACTIVITIES!

Nolan has set schedule, expectations, and easy to follow lessons.  Carlie on the other hand, is supposed to do 2 learning activities, away from technology and document them to her teacher with a photo and few sentences about how she liked it or what she said about it.

Here are a few ideas that Carlie has been enjoying with things I had around the house.  Nothing special is needed and there are lots of substitutions/interchangeable items.

📌 Pin HERE for Later!

Salt Letter Writing:

Using a ziplock bag, pour salt to fill halfway.  Tightly seal and put tape over the top to prevent an accidental spill.  Practice writing letters and numbers in the salt.  We pulled different letters from a bag to give a visual.  You can also just pour the salt on cookie and make letters on it. HOWEVER, I prefer to keep the mess to a minimum and we can reuse the bag easily anytime she wants to try again!

Magnet Letter Matching

Use magnet letters (we have been using THIS SET because it has both upper and lower case plus numbers) to match lower case to upper case and vice-versa.  I printed off a sheet with the capitals and one with lower case, but you can hand write your own chart or just line up on set with a space between and match away!

You can do this on the fridge or use a cookie sheet.  The cookie sheet works great because kids can sit at the table and work or even on the couch with the sheet on their lap!  Plus it sort of holds the objects in one place.  Less spread of small things!

If you don’t have magnet letters, you can make post it notes to stick over the top! Remember to practice saying each letter and the sound to keep the skills up

Pipe Cleaner Letters

Grab a few pipe cleaners and shape into letters.  This was really easy and kept Carlie very entertained.  She realized quickly she could make most upper and lower case letters and using 2 at time made letters like F and T!

Magnet Number Counting

Print a grid off with ‘dots’ marking each number on a sheet.  You can also just draw one out the exact same way.  Stick the sheet on the fridge or a cookie sheet.  Let the kid count the dots and match the magnet number onto each correct grid spot.

Magazine Letter Cutting

There are several variations to do with this project.  I prefer to do one letter on a sheet with upper and lower case plus words that start with that letter.  You could also do a grid with each letter of the alphabet and cut a letter for each.

However, we have found it easier to focus on a single letter a day than the entire alphabet.  This builds letter recognition plus fine motor with scissors.  Just grab some old magazines, print ads, or newspapers.  Note: Food Magazines typically are the GO TO.  Lots of variety and easily recognized words/objects.

In the photo is the letter C.  3 sections and just a glue stick to paste down the cuttings.  We used cookies, cheese, cat food, cables ties, and clock for words we found.  You can also add a dotted line for writing practice!

Shape Pizza

Using a paper plate create a shape pizza! Color the inside of the pizza red and the outside brown.  Then use shape counters (we use THESE buttons because they are a nice size and include a great color and shape variety) or cut some construction paper out in different colors and shapes to build a pizza.

I hand wrote a sheet with a blank spot for the quantity and added the shape words and a fast sketch of the shape.  Then put the numbers on post it notes and moved them around to scramble up the quantities for a few rounds of play. i.e. 5 Octagons, 4 Triangles, 3 Circles, 2 Stars, 1 Square, etc.  You could do it with colors instead of shapes, too!

While doing this she turned it into her own game of custom pizzas. The black – olives, red – pepperoni, purple – onions, green – peppers, etc.   She took my order and made me slice after slice! This kept her occupied for a long time just with imaginary play.

Paper Plate and Clothes Pins Counting

Using a paper plate, pie chart divide it out with a marker into the number of sections you want.  I did 15.  Then, using a different color marker or stickers put counter dots onto each pie piece to equal one number.  Write each number onto each clothes pins.  Carlie counts the dots and pinches the clip onto the matching pie segment.

If you don’t have clothes pins, post it notes with the numbers or magnet numbers would work too!  I grab clothes pins from the dollar store or Menards when they are free after rebate.  They come in handy for blanket forts and other little crafts from time to time!

  • Don’t forget about sensory bins with things like beans, rice, or orbeez.  Carlie LOVES this kind of play with just some measuring cups, spoons, and funnels.  Just throw a sheet on the floor or take it outside!  Typically the mess is minimal.
  • PLAYDOH! I know, it can get messy, but really it is a huge distraction and attention keeper.  I get out one color for her and all the cookie cutters, rollers, plastic knives, etc and she goes to town.  Since we don’t play with it a lot, its a good one for rainy days, or when nothing is making her happy/occupied.
  • Also this Melissa & Doug easel, with letters, paper, chalk board, and dry erase side is perfect for table top.  Sketching and drawing is easy with a whole roll of paper, and she practices writing her name or Nolan’s!
  • Coloring books and crayons. Keep a stash put away of dollar store books and pull a new one out occasionally.  The fresh pages will give a welcome distraction to keep little minds busy for awhile.

Organization Note:

Rather than keeping many of our puzzles, letters, and counters in the packaging they come in, I put them in THESE poly zip top bags.  They are sturdy, large and make storing so easy.  The items are all in the same size and shape and fit easily in a drawer or basket.

For puzzles, I cut the cover off the box, add it to the bag with the pieces and toss the box!  I store them all in one basket and they can be flipped through fast rather than a stack of boxes waiting to topple when you pull one out.


Disclaimer: Midwest Coupon Clippers is a participant in the Amazon Services LLC Associates Program. Product prices and availability are accurate as of the date/time indicated above and are subject to change.

Keep Reading…

Filed Under: Featured, This & That

Moon Foam – 2 Household Ingredients, HOURS of fun

April 9, 2020 By Leah Leave a Comment


Moon Foam – 2 Household Ingredients, HOURS of fun

Okay, we are ALL well past the “I AM BORED” stage of the current events.  We have built blanket forts, watched WAY to much Disney+ and Netflix, built every puzzle in the house, played games, done orbeez, read stories, played outside, constructed legos, Found Waldo, drawn and colored, and the list can go on and on.

Looking to mix up the play on a cool rainy day, I stumbled on this idea.  Using 2 common products, mix up a batch of the most amazing, soft, moldable play dough you have ever used!

In 2 minutes we mixed up a batch and gave the kids an hour of free play while I got dinner made!  This dough is more soft and almost taffy like than store bought dough, but it really was fun and had different texture that was very enticing.

Nolan found a few bigger plastic trucks and rolled though it making tire tracks and even some ‘boulders’ and lifted them to a dump truck.  Carlie was content rolling and flattening out pieces and cutting out ‘cookies’.

PLUS, using the conditioner made for a lovely smell and soft moisturized hands!

📍 Pin HERE for Later!

What you need:

  • 1 c. Corn Starch
  • 1/2 c. inexpensive hair conditioner
  • food coloring if desired

In a large mixing bowl combine the first 2 ingredients with a stiff spatula.  If the dough is a little too sticky, add a bit more starch.  I added about 1 additional TBSP to get a nice moldable consistency.  Once totally combined, add a few drops of food coloring and knead together with your hands.

Note: If playing on a wood table, I would recommend a cookie sheet to keep from sticking into the table cracks and crevices.  This was not messy, but slightly more tacky than regular play dough!

Filed Under: Featured, Fun for the Family, This & That, Uncategorized

Whipped Coffee – Make your Own Coffeehouse Iced Latte from Home!

April 5, 2020 By Leah Leave a Comment

If you love Online Shopping as much as we do, make sure you come over and join our “Online Deals – Check them out” Group on Facebook HERE, Where we share some of our favorite deals we find!


Disclaimer: This post contains affiliate links and we will be compensated if you make a purchase after clicking on our links. You can view MCC’s Full Disclosure Policy HERE.

Whipped Coffee – Make your Own Coffeehouse Ice Latte from Home!

Okay, I fell for the viral videos of this ‘Dalgona’ style whipped coffee.  Well I was SHOCKED when it (1) Worked and (2) Tasted Great!  You only need a few ingredients and 5 minutes to make an iced coffee that tastes like any expensive Iced Latte made by your favorite Barista!

Gather Up the Goods:

  • 2 Tbsp. Instant Coffee Grounds
  • 2 Tbsp. Boiling Water
  • 2 Tbsp. Sugar
  • Milk (any will work including non-dairy options)
  • Ice in a cup
  • Cinnamon for garnish if desired

Now make it:

  1. Bring a cup of water to boil.  Using a measuring spoon, dip out 2 Tbsp and add to the bowl of a stand mixer.
  2. Add the instant coffee grounds to mixing bowl
  3. Stir to completely dissolve the coffee – it will be thick but be sure to get all the crystals stirred in
  4. Add Sugar to coffee/water mix
  5. Turn mixer on to high and whip for 5 minutes until light, fluffy, and glossy.  It will form soft peaks
    A hand mixer will work, also!
  6. Fill a cup with ice and add milk.
  7. Dollop the whipped mixture into the cup and top with cinnamon if desired. The whip is sticky, almost like marshmallow cream.
  8. Slowly stir to combine and the result is a frothy, rich, delicious iced latte.

I use about 1 c. of milk and a few generous scoops (about 2 TBSP) of the whipped coffee on top.  I would say this makes 2 small size drinks or one large single serving.  Add more or less milk base on how strong your enjoy your coffee!

I LOVE these reusable straws found HERE or HERE  They both are tall enough for my Yeti Tumbers and work in smaller cups, too!

Notes: The whipped mixture tastes OKAY plain, but is very strong and bitter, so don’t take a giant spoonful to give it a taste!  Also, I highly suggest the cinnamon, its a perfect note to enhance the coffee flavor.  I have stored one part of the whipped mixture in the fridge overnight to use the following day, and it held its texture perfectly to make a second drink.

Applesauce Muffins Recipe

Mini Cinnamon Sticky Rolls

Streusel Coffee Cake


Disclaimer: Midwest Coupon Clippers is a participant in the Amazon Services LLC Associates Program. Product prices and availability are accurate as of the date/time indicated above and are subject to change.

Keep Reading…

Filed Under: Featured, Recipes, Uncategorized

Pasta Easter Egg Craft

March 21, 2020 By Leah Leave a Comment

If you love Online Shopping as much as we do, make sure you come over and join our “Online Deals – Check them out” Group on Facebook HERE, Where we share some of our favorite deals we find!


Disclaimer: This post contains affiliate links and we will be compensated if you make a purchase after clicking on our links. You can view MCC’s Full Disclosure Policy HERE.

Are your kids cooped up and looking for something to do? Don’t worry, we are right there with you, too!  In an effort to find things to keep minds busy and avoid more screen time (we already are doing extensive e learning), I found this SIMPLE idea to make Decorated Paper Easter Eggs.

Using items you probably already have, turn the kids loose with some construction paper and glue! Talk about colors, shapes, sizes, textures, and encourage them to cut their eggs and sort the pasta.  There are endless ways to incorporate learning opportunities with this one!

What you need

  • Ziplock Baggies
  • Pasta in Different Shapes
  • Food Coloring
    I prefer gel colors because less is needed to get deep, true colors, but ANY will work! One brand I like are THESE.
  • Rubbing Alcohol or Vinegar
  • Construction Paper or Card Stock
  • Glue
  • Scissors

To color pasta

  1. Put a small portion of pasta into a ziplock bag (about 1/3 c.) Add a few drops of rubbing alcohol to the bag and a few drops of food coloring.  You don’t need much alcohol to spread the color around.  Just enough to make it slightly fluid.  I would say about 1/2 tsp.
  2. Seal the bag up tight and shake it around.  Once pasta has taken on the color, pour it out onto a sheet of newspaper or parchment paper.
  3. Repeat for each additional color – be sure to space dyed pasta on the paper so they don’t run together until dry.
  4. After a few hours you can shake the paper around to turn the pasta to make sure it gets evenly dry.
  5. Allow to dry overnight.  The rubbing alcohol will evaporate and leaves the pasta a rich color and still completely dry and hard.
  6. If pieces stick together, gently roll with dry fingers and they break loose.
  7. Vinegar would also work in place of the alcohol, but will not evaporate as quickly.
  8. We used penne, bowties, stars, broken spaghetti, and a short cut tube pasta I had.

Make the eggs

  • Using construction paper or card stock, cut out an egg shape.
  • Paste the pasta onto the egg in any pattern you like.  Be sure to talk about the shapes and patterns as you work.  Encourage your crafters to be creative and spot the patterns whether a shape or color!
  • Note, we used q-tips to apply the glue to the paper and then placed the pasta on top.  Putting the glue on the pasta proved (1) hard to manipulate (2) made the color start to bleed.
  • OVERALL, this was nearly mess free.  If the pasta got too much glue, it did bleed a little but putting the glue to the paper first seemed to keep this under control.


Mess Free Easter Egg Coloring!

Easter Egg Pops


Filed Under: Around the House, Featured, Fun for the Family, This & That, Uncategorized Tagged With: Craft, Easter, Easter Eggs, Kids Crafts, Preschool Crafts

Preschool Counting Busy Activity

March 20, 2020 By Leah Leave a Comment

If you love Online Shopping as much as we do, make sure you come over and join our “Online Deals – Check them out” Group on Facebook HERE, Where we share some of our favorite deals we find!


Disclaimer: This post contains affiliate links and we will be compensated if you make a purchase after clicking on our links. You can view MCC’s Full Disclosure Policy HERE.

Preschool Counting Busy Activity

Pin HERE

Welcome to quarantine, social distancing, and self isolation! Words I never thought I would say in a blog post.  BUT, since that is our current life we are making the best of it.  Both of my kids are expected to maintain some level of learning while we are on their extended period off school.

Nolan has been provided a well put together curriculum, however Carlie is expected to do 2 learning activities, away from screen time, per day. Her teacher provided a few ideas but the rest is up to us!

This a.m. I needed something to keep her occupied so one of the kid’s could take a test.  This EASY task bought me a solid 2 hours of entertainment for her and was a perfect age level skill drill.  Even better, no special items needed! You have everything you need!

Using just a muffin tin, sticky notes, and counter toys she played happily and quietly.

Make one:

  • Grab a muffin tin (or ice cube tray, some paper cups, or draw a chart on a sheet of paper)
  • Using post it notes, write and spell out the numbers 1-12
  • Put one number sheet inside each muffin cup
  • Now your preschooler can count their ‘counter’ figures into each muffin cup.

I had the automotive shapes stashed away for a day of boredom and glad I could pull them out!  There are tons of other options you probably have right at home!  Q tips, cotton balls, craft pom poms, pasta (penne, bowties, etc), jelly beans, m&ms, buttons, dried beans, or hair ties, to name a few!

Now because I had colors and shapes with this set, it quickly went from let’s count to… just use red, or just use green, to find all the trains or cars! These counter sets are between $10 & $15 but for the entertainment value – PRICELESS!  Occasionally, Target has these in small bins of 30 count in the ‘Buck Spot’ for $3.  Be on the lookout!

Look a few sets I spotted on Amazon HERE

  • Learning Resources Backyard Bugs Counters, Educational Counting and Sorting Toy, Set of 72
  • Learning Resources Three Bear Family Counters, Educational Counting and Sorting Toy, Rainbow, Set of 96 Ages 3+
  • Roylco Inc. Really Big Buttons 60/Pkg.
  • Learning Resources Mathlink Cubes 100 ct


Filed Under: Around the House, Featured, This & That, Uncategorized

Leprechaun Blossom Cookies

February 25, 2020 By Leah Leave a Comment

Leprechaun Blossom Cookies

I turned one of my favorite shortbread cookies into a St. Patrick’s Day green cookie. By adding a bit of mint flavor, green food color, and seasonal sprinkles, these simple little cookies become Leprechaun Blossoms!

📍 Pin HERE for later!

  • 1/2 c. butter – room temp.
  • 1/2 c. powdered sugar
  • 1 t. vanilla
  • 1/2 t. mint extract
  • 1 1/4 c. flour
  • 1 T. milk
  • green food color

Filling:

  • 1/4 c. heavy cream
  • 1/2 c. chocolate chips
  • green sprinkles

Make it:

  1. Using a mixer, cream butter and sugar until combined and fluffy.
  2. Add vanilla, mint, and green color (a few drops to make a nice green color).
  3. On low, mix in flour.  Dough will be very dry and crumbly.
  4. Add milk (may need a bit more) just until dough comes together. Don’t make the dough sticky, just moist enough to roll into balls
  5. Form dough into 1″ balls and chill for 30 minutes
  6. Preheat oven to 350° while dough chills.
  7. Bake for 12 minutes until set and just barely brown
  8. Remove from oven and immediately, using the end of a wooden spoon or teaspoon measuring spoon, press a divot into each cookie.
  9. Move to a cooling rack and completely cool

While cookies are baking prepare ganache filling:

  1. In a microwave safe bowl, bring cream to a simmer in microwave (about 45 seconds)
  2. Remove from microwave and stir in chocolate chips.  keep mixing until combined and glossy.
  3. Allow ganache to cool, but still pourable, as cookies bake and cool
  4. Once cookies are completely cool, fill indents with chocolate.
  5. Top with sprinkles if desired.

You could fill cookies with your favorite buttercream or even some store bought frosting!

Filed Under: Featured, Recipes, Uncategorized Tagged With: cookies, Dessert, Holidays, St. Patrick's Day

  • « Previous Page
  • 1
  • …
  • 23
  • 24
  • 25
  • 26
  • 27
  • …
  • 210
  • Next Page »

{ Your info will never be shared because spam stinks }

Archives

Deals

2-Pack Girls Tank Dress w/Pockets ONLY $6.50! Sizes 4-18 & Plus

Walgreens Photo: FREE 8X10 Photo Print – Valid through 7/25

Additional 50% OFF Clearance!

Walmart Online: $5.95 (Reg. $16.98) 18 Mega Rolls Great Value Ultra Soft Toilet Paper

Summer Cyber Days at Kohl’s – Daily Deals & FREE Shipping for Everyone

More Deals

Coupons

75% Off! 5×7 or 8×10 Wood Panel Photo Prints

Hellmann’s (Unilever) Sign UP Rewards! $5 towards your next purchase + Get exclusive details about new products, recipes & savings

Kohl’s Last Minute Gift Sale – Valid thru 12/24

EXCLUSIVE OFFERS: Additional 10% off ALL these sale prices!

Have you tried Mike’s Popcorn? If not, you are MISSING OUT!

More Coupon Posts

Sweeps & Giveaways

Merry Christmas Giveaway – 2 Hatchimals & One Nintendo NES

Win A Zoo Pass From Zoological Society Of Milwaukee!

Culver’s Cow Tippin’ Instant Win Game!

WIN a Dream Vacation from Club Med!

WIN a Trip to the Indy 500 from Craftsman (2 Tickets, Airfare, and Hotel Included)

More Sweeps & Giveaways

Copyright ©2025, Midwest Coupon Clippers. All Rights Reserved. Site by Pixel Me Designs