Midwest Coupon Clippers

Cudding Coupons and Saving You Some Moolah

  • Home
  • Coupons
    • Newest Coupons
    • Coupons.com
    • Red Plum
    • Smart Source
    • Hopster
    • Saving Star
    • Coupon Database
  • Deals
    • Amazon
    • eBates
  • Freebies
  • Sweeps & Giveaways
  • Store Match-ups
    • Midwest Matchups
      • Copps/Pick n’ Save
      • Festival
      • Menards
      • Piggly Wiggly
    • Nationwide Matchups
      • CVS
      • Dollar Stores
        • Dollar General
        • Dollar Tree
        • Family Dollar
      • Target
      • Walgreens
      • Wal-Mart
  • This & That
    • Recipes
    • Around the House
    • Money Saving Tips
    • Get Organized
    • Disney
    • Pets
    • Gardening
  • About
    • Contact
    • Disclosure

Homemade Slow Cooker Apple Butter

September 29, 2015 By carry Leave a Comment

 12079243_10153608331986665_2303905684680258664_n

Homemade Slow Cooker Apple Butter

When I think of fall my mind automatically goes to apple orchards, so there isn’t anything better in my mind than a sink full of freshly picked apples! My mind races….what to do with them? Apple crisp? Applesauce? Apple pie? All of them are fabulous but this year it’s time to make apple butter.  If you’ve never made it before because you think it’s intimidating or maybe too hard, think again! This was honestly the easiest recipe I’ve ever done and it came out perfect! If you have a slow cooker, this recipe is for you!

This recipe will make about six cups of apple butter.

  • I used about 6.5 pounds of apples and I peeled, cored and sliced them all (by hand, yikes! If you don’t want to do them by hand, invest in an apple peeler!)
  • 1/2 cup granulated sugar (if you like yours sweeter, you can add more sugar, or less!)
  • 1/2 cup packed brown sugar
  • 1 1/2 tablespoons ground cinnamon (or you can throw in a few cinnamon sticks, it’s up to you!)
  • 1/4 teaspoon salt
  • 1 tablespoon vanilla extract

Instructions:

Place all your cut apples in your slow cooker.  I HIGHLY suggest using the slow cooker liners! They make clean up a breeze, especially after you’ve had apples cooking all day in it.  Less mess!

12088028_10153608332261665_3296976265993158202_n

Add the sugars, cinnamon, vanilla and salt to your apples in the slow cooker. Doesn’t that look amazing? I can smell it already!  Cook in the slow cooker for 10 hours on low.  Make sure you stir them every couple hours to keep it all even.  When it’s finished cooking, your apples should be a dark brown color and very thick.  Take your apples out of the slow cooker and place into a blender or food processor to blend smooth.  Now, this is up to you on the texture that you like! We like ours very smooth so just keep going until it’s how you like it!

12063738_10153608332326665_4763102468753440059_nWhen it’s finished, you can either place in an air tight container to be stored in the refrigerator for up to two weeks, in the freezer in a container, or if you have time, you can start to can it! This makes a wonderful gift with some homemade bread or other canned items!

ENJOY!

Filed Under: Recipes

Last Minute Ghoulishly Good Halloween Treats

September 19, 2015 By Heather Rodefer Leave a Comment

Last Minute Ghoulishly Good Halloween Treats


1

Super Simple and easy to do!

Supplies:

  • Construction Paper
  • Scissors
  • Halloween Treat Bags (Dollar Tree 40 per package)
  • Cinnamon Toast Crunch
  • Chocolate Chips
  • Mini Marshmallows
  • Candy Corn

Directions:

  • Print labels on construction paper that read “Ghost Poop”, “Monster Scabs”, “Jack O Lantern Teeth”, and “Witches Warts”; cut out lables.
  • Fill one treat bag with mini marshmallows, one bag with candy corn, one bag with chocolate chips, and one bag with cereal.
  • Staple Ghost Poop label to mini marshmallow treat bags, Jack O Lantern label to candy corn treat bags, Witches Wart label to chocolate chip treat bags, and Monster Scabs label to cereal treat bags!

1(Photo Credit: Unknown)


Filed Under: This & That, Uncategorized

Crock Pot Ranch Beans Recipe

September 19, 2015 By Heather Rodefer Leave a Comment

1

Crock Pot Ranch Beans Recipe

A crock pot recipe where the hardest thing is opening all the cans!  A great way to let your kids help out in the kitchen!

Ingredients:

  • 1 pound ground beef or turkey
  • 1 pound bacon
  • 1 medium onion, chopped
  • 1 and 1/3 c. brown sugar
  • 2 tsp. dry mustard powder (NOT YELLOW MUSTARD)
  • 1 c. ketchup
  • 1 t. salt
  • 1 T. vinegar
  • 4 cans – (15-18 oz) Beans of your choice (navy, cannellini, black, pinto, butter, kidney, etc.) just a few kinds for texture and color variety)
    1 – 28 oz can baked beans undrained (any flavor or variety) or 2 smaller cans (does not have to be exact weight!)

Directions:

  • Brown ground beef, bacon and onion; drain grease.
  • Rinse and drain the cans of plain beans and add to crockpot.
  • Add all remaining ingredients and stir together.
  • Bake on LOW for 6 hours stirring once or twice.

Filed Under: Recipes, Uncategorized

Family Tree Hand Print Kids Craft Project

September 19, 2015 By Heather Rodefer Leave a Comment

1

Family Tree Hand Print Kids Craft Project

Supplies:

  • Paint (Brown, Yellow, Red, Orange, any others you would like for your tree)
  • Brown Paper Grocery Bag
  • Scissors
  • Paint Brush

1

Directions:

  1. Using scissors, cut side of paper bag and remove bottom and handles.  Lay bag flat on table.1
  2. Paint your child’s/children’s hand with brown paint and have them “stamp” the paper with their hand.  (You can also do this with a pets paw print if you so choose.  This will be the branches at the top of the tree.  Once the hand prints are in place, use your paint brush to paint on the tree trunks.1
  3. Let your child/children dip their fingers into the red/yellow/orange paint and make finger prints over the “branches” of the trees to make the leaves!  When you are finished, you will have a personalized “Family Tree”!1

Filed Under: This & That, Uncategorized

Oven Baked S’Mores

September 10, 2015 By Heather Rodefer Leave a Comment

1

Oven Baked S’Mores

Save to your Pinterest board here: https://www.pinterest.com/pin/420101471469495233/

Summer is coming to an end but that doesn’t mean you have to put away that marshmallows and stop enjoying your favorite summertime treats!  Grab the Hershey bars, marshmallows, and graham crackers and get ready for a great treat your entire family is going to LOVE!!!!

Supplies

  • Cupcake Pan
  • Cupcake Liners

Ingredients

  • Crescent Rolls
  • Graham Crackers (1 package crushed)
  • Hershey Bars (2 full size bars)
  • Marshmallows
  • 1/2 Stick Butter (melted)

Directions

  1. Unroll crescents and place 3 rectangles of chocolate on the large end of the triangle.
  2. Place one marshmallow on top of the chocolate.
  3. Wrap crescent around chocolate and marshmallow making sure to seal all edges.
  4. Using pastry brush, cover crescent in melted butter.
  5. Roll butter covered crescent in crushed graham crackers until fully coated.
  6. Place in cupcake liner in cupcake pan and bake at 350 degrees for 10 minutes.
  7. Cool for 5 minutes and enjoy!1


Filed Under: Daily Coupon Round-up, Recipes

EASY Freezer Breakfast Sandwiches!

September 9, 2015 By Sam Leave a Comment

easy freezer breakfast sandwiches

EASY Freezer Breakfast Sandwiches!

Pin this recipe for easy access later: https://www.pinterest.com/pin/420101471469485076/

Ingredients:

  • English Muffins
  • Eggs – 10 + a splash of milk & a pinch of salt
  • Breakfast Meat – I used Canadian Bacon… I was in a circles kind of mood… LOL
  • Cheese Slices – I used Sargento Ultra Thin Slices, so I could add 2 different kinds of cheese
  • Pam

What You’ll Need:

  • Short Cake Cutter
  • 9×13 Cookie Sheet
  • Blender

Step 1: Pre-Heat your oven to 375 degrees. Now, blend up your eggs. I used my Ninja blender to quick mix the 10 eggs with a little bit of milk… about a 1/4 cup and add a pinch of salt. Using a blender also helps get them FLUFFY, instead of dense.

Step 2:  Then spray your cookie sheet with PAM and pour out onto your cookie sheet. Put in the oven for about 20 minutes… give or take a few… until eggs are firm.

Step 3: While eggs are cooking I cooked my breakfast meat a bit, I also put the Canadian bacon on a cookie sheet and into the oven it went!

Step 4:  NOW it is time to assemble! Cut your English Muffins in half length wise. I used a pastry cutter to cut my eggs and cheese into neat circles! Assemble & TA-DA! YUMMY & EASY breakfast sandwiches.

Step 5:  Freeze in bags. Microwave 1-2 minutes (until heated thru) on a papertowel.  They taste EVEN BETTER after they were frozen and heated up for breakfast!

breakfast sanwichs 1 breakfast sanwichs 2
breakfast sanwichs


Filed Under: Recipes, Uncategorized

Soda Can Cake Recipe

September 9, 2015 By Micki Leave a Comment

Soda Can Cake Recipe

Pin It HERE: https://www.pinterest.com/pin/420101471469482509/

Yes it REALLY IS as simple as it sounds! Take a normal Cake box mix, add 12 ounces of a carbonated soda and bake as normal! DO NOT MIX any other ingredients in, NO eggs, NO water, NO oil, just the soda. Create your own flavors. Here are a few flavors a friend shared with me. The cake comes out SUPER MOIST and yummy, I was pleasantly surprised!

soda cake mixes(Photo Credit – Unknown Publisher)


Filed Under: Recipes, This & That

Cheesecake Recipe – Yellow Cake Crust

August 14, 2015 By Micki Leave a Comment

cheesecake yellow cake crust

Cheesecake Recipe – Yellow Cake Crust

Pinterest: PIN IT HERE!

I wanted to share with you all my Mom’s cheesecake recipe. This is different then the traditional cheesecake crust. It is made with a yellow cake mix, and I personally think so much better then the graham cracker crust. Give it a try, I am pretty sure you will like it!

Ingredients:

  • 1 pkg. Yellow Cake Mix
  • 2 tbsp. Cooking Oil
  • 2 – 8 ounce pkgs. Cream Cheese
  • 1/2 cup Sugar
  • 4 Eggs
  • 1 1/2 cups Milk
  • 3 tbsp. Lemon Juice
  • 3 tsp. Vanilla
  • 1 – 1lb. 5 ounce can Cherry Pie Filling (or topping of choice)

Directions:

  • Preheat Oven to 300 Degrees Fahrenheit
  • Reserve 1 Cup of Dry Cake Mix
  • In large bowl combine remaining cake mix, 1 egg and oil (mixture WILL BE crumbly).
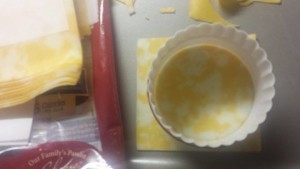
  • Press crust evenly into bottom and 3/4 of the way up sides of greased 9×13 inch pan.

cheesecake 3

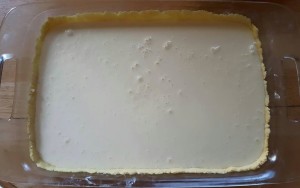
  • In same bowl blend cream cheese and sugar. Add 3 eggs and reserved cake mix. Beat 1 minute at medium speed. At low speed slowly add milk, vanilla and lemon juice. Mix until smooth.
  • Pour Mixture into Crust.

cheesecake 2

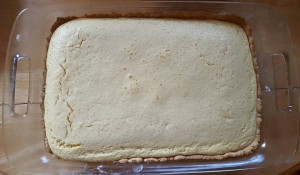
  • Bake at 300 degrees for 45 to 55 minutes or until center is firm.

cheesecake 1

  • When cool, top with pie filling.
  • Store in refrigerator.


Do you use Pinterest?  Pin this recipe HERE for easy access later!

Filed Under: Recipes, This & That, Uncategorized

Individual Pineapple Upside Down Cakes

July 29, 2015 By Micki Leave a Comment

upside down pineapple cupcakes

Individual Pineapple Upside Down Cakes

Ingredients:

  • cooking spray
  • ½ cup butter, melted
  • 1½ cups brown sugar
  • 24 maraschino cherries
  • 1 (20 ounce) can crushed pineapple (reserve juice)
  • 1 (18.25 ounce) package yellow cake mix (and oil and eggs called for on the package)
  • 1⅓ cups pineapple juice (you just need as much pineapple juice as water called for on the cake mix package – see note)
  • confectioners’ sugar for dusting
Notes:
Just replace the water called for in your cake mix with pineapple juice. You should be able to reserve the juice from the crushed pineapple and have enough pineapple juice to use here. If you are a little shy on the amount of juice, just use water to fill the rest of the liquid called for in the recipe.
*Some people like the look of pineapple tidbits better for this recipe. I tried both and the crushed pineapple has a lot more flavor and looked prettier.

Instructions:

  • Preheat oven to 350 degrees and spray 24 muffin cups with cooking spray.
  • Line a work surface with parchment or waxed paper.
  • Spoon 1 teaspoon melted butter into the bottom of each sprayed muffin cup.
  • Spoon 1 tablespoon brown sugar in each muffin cup.
  • Press a maraschino cherry into the center of the brown sugar in each muffin cup.
  • Spoon a heaping tablespoon of crushed pineapple over the cherry and compact it with the back of a spoon into an even layer.
  • Mix cake mix according to the package directions, replacing the water with pineapple juice. This may vary according to which cake mix you use. In large bowl with electric mixer on low speed until moistened, about 30 seconds. Turn mixer speed to medium and mix for 2 minutes.
  • Pour pineapple cake batter into the muffin cups, filling them almost to the top.
  • Bake in the preheated oven on the middle rack until a toothpick inserted into the center of a cupcake comes out clean, about 20 minutes.
  • Allow cupcakes to cool at least 5 minutes before inverting muffin cups onto the waxed paper to release. Serve with pineapple and cherry sides up. Sprinkle cupcakes lightly with confectioners’ sugar if desired.

Go HERE to add to Pinterest for easy retrieval!

Source: Here & Here

Filed Under: Recipes, Uncategorized

Green & Gold Stuffed Pepper Soup (Crock Pot Recipe)

July 26, 2015 By Micki Leave a Comment

green & gold stuffed pepper soup

Green & Gold Stuffed Pepper Soup (Crock Pot Recipe)

Do you like Stuffed Pepper Soup? Want to try a healthier option? Here is what I came up with today after needing to use up some Yellow Squash Zucchini & Green Peppers from our garden. Lovingly named by my son, “Green & Gold Stuffed Pepper Soup.” The name may or may not have something to do with the fact we are from Wisconsin. GO PACKERS!

Ingredients:

  • 1 Medium Sized Yellow Squash Zucchini
  • 1 Medium Onion
  • 8 Green Bell Peppers
  • Two Cans of diced Tomatoes (14.5 ounce) – I used organic, salt free)
  • 1 can of tomato paste (12 ounce)
  • Eight Cans of Water (Use tomato Paste Can) IF you want that “beef” taste you could add some beef stock
  • 2 tsp. Chili Powder (More if you like)
  • (Optional) 1 tsp. salt

Directions:

  • Wash Green Peppers, core and chop into pieces
  • Wash Zucchini, cut off both ends, then chop into pieces (I DO NOT PEEL. I use EVERYTHING except for the ends.)
  • Peel & dice onion
  • Add all chopped veggies above to crock pot
  • Add both cans of diced tomatoes, can of tomato paste, and eight cans of water to crock pot
  • Add 2 tsp. of Chili Powder to crock pot
  • Mix it up
  • Cook on high for 8 to 10 hours (depending on if you want crunchier veggies)

That is it, Simple as that. It ended up tasting delicious! My husband who DOES NOT LIKE soup even enjoyed it. If you would like your soup a little thicker, leave out a few cans of water. It tastes just as good if not better then regular stuffed green pepper soup with ground beef and rice, just a healthier version.


Filed Under: Recipes

  • « Previous Page
  • 1
  • …
  • 16
  • 17
  • 18
  • 19
  • 20
  • …
  • 33
  • Next Page »

{ Your info will never be shared because spam stinks }

Archives

Deals

Disney Princess Styling Heads ONLY $5.59

Today Only! 40% Off Matching Pajamas For All – Includes Grinch Styles!

Today Only! 40% OFF Craft Toys & Activity Kits

200 Count Paper Napkins ONLY $1.99 (Limit 3) Reg. $3.49

Clearance BLOWOUT! Additional 50% off

More Deals

Coupons

75% Off! 5×7 or 8×10 Wood Panel Photo Prints

Hellmann’s (Unilever) Sign UP Rewards! $5 towards your next purchase + Get exclusive details about new products, recipes & savings

Kohl’s Last Minute Gift Sale – Valid thru 12/24

EXCLUSIVE OFFERS: Additional 10% off ALL these sale prices!

Have you tried Mike’s Popcorn? If not, you are MISSING OUT!

More Coupon Posts

Sweeps & Giveaways

Merry Christmas Giveaway – 2 Hatchimals & One Nintendo NES

Win A Zoo Pass From Zoological Society Of Milwaukee!

Culver’s Cow Tippin’ Instant Win Game!

WIN a Dream Vacation from Club Med!

WIN a Trip to the Indy 500 from Craftsman (2 Tickets, Airfare, and Hotel Included)

More Sweeps & Giveaways

Copyright ©2025, Midwest Coupon Clippers. All Rights Reserved. Site by Pixel Me Designs