
Craft Project: Stuffed Easter Treat Gifts
Items Needed:
- Scrapbooking Paper Construction
- Paper Ziploc Bags (sandwich size)
- Easter Candy (we used jelly beans & M&M’s)
- Hot Glue Gun
- Glue Sticks Elmers Glue Scissors

Directions:
- Start by making patterns out of construction paper. We made an egg, bunny, and chick. Size can vary, just big enough that a sandwich sized ziploc bag can be the belly. If you have a Cricut machine, you can use that, too!
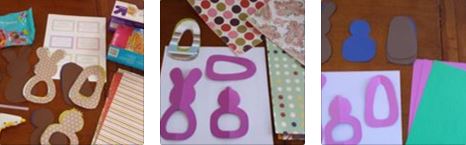
- Trace your patterns on scrapbooking paper and cut them out. *Tip – if you trace them on the back, opposite side of the pattern, you will not have to erase pencil marks. You can slightly fold the belly part to cut to get an even circle for the belly. Trace just the outside of your pattern on construction paper and cut out. These will be the back of your goodie bags.
- On the construction paper shapes, use the glue gun to make a thin line around where the belly would be & glue the ziploc bag down, just enough to get the first layer of the bag to stick.
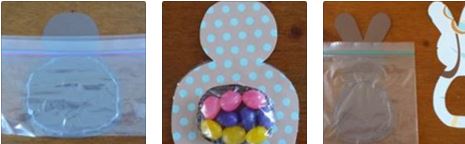
- Fill your bag with candy & place the top scrapbook piece over top to see if you have enough (or too much candy) that will peek through the belly window.
- Once enough candy, you’ll do a thicker line of hot glue around the edge of the belly on top of the second layer of the ziploc bag & quickly glue the top scrapbook piece to the bottom, firmly pushing the edges together. *Tip – hot glue will melt the ziploc bag & make it start shrinking in towards the candy, just aim to do the line of glue a bit more toward the outer edge of the belly to give you more room.
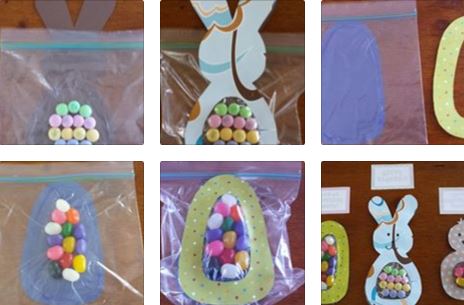
- Cut the remnants of the ziploc bag.
- Use Elmers glue to finish gluing the heads on the chicks & bunnies.
- When dry, feel free to draw faces on the chicks and bunnies. If the top & bottom pieces didn’t completely glue together, feel free to use a bit more hot glue & glue back together so the candy won’t leak out.
Leave a Reply