Midwest Coupon Clippers

Cudding Coupons and Saving You Some Moolah

  • Home
  • Coupons
    • Newest Coupons
    • Coupons.com
    • Red Plum
    • Smart Source
    • Hopster
    • Saving Star
    • Coupon Database
  • Deals
    • Amazon
    • eBates
  • Freebies
  • Sweeps & Giveaways
  • Store Match-ups
    • Midwest Matchups
      • Copps/Pick n’ Save
      • Festival
      • Menards
      • Piggly Wiggly
    • Nationwide Matchups
      • CVS
      • Dollar Stores
        • Dollar General
        • Dollar Tree
        • Family Dollar
      • Target
      • Walgreens
      • Wal-Mart
  • This & That
    • Recipes
    • Around the House
    • Money Saving Tips
    • Get Organized
    • Disney
    • Pets
    • Gardening
  • About
    • Contact
    • Disclosure

Instant Pot Pulled Pork – One Meat Prep, 5 Delicious Meals!

April 13, 2018 By Leah Leave a Comment

Disclaimer: This post contains affiliate links and we will be compensated if you make a purchase after clicking on our links. You can view MCC’s Full Disclosure Policy HERE.

Instant Pot Pork – One Meat Prep, 5 Delicious Meals!

After much debate and hearing from EVERYONE how much they loved their pressure cookers – I did it,  I caved and purchased an Instant Pot!

After letting it sit in the box for a few weeks, scared to death of it, I finally pulled it out.  Boy am I glad I finally got brave and fired that bad boy up!  It is amazing how quickly the food cooks.  So far my trials have included mashed potatoes, chicken a few different ways, and an amazing pork tenderloin.

In this post I am going to share with you a basic pulled pork recipe and how to make it into a  5 meals. One meat prep and 5 delicious meals. Now that is the way to meal plan!!

📍 Pin it HERE!

Meal #1

Basic Pulled Pork

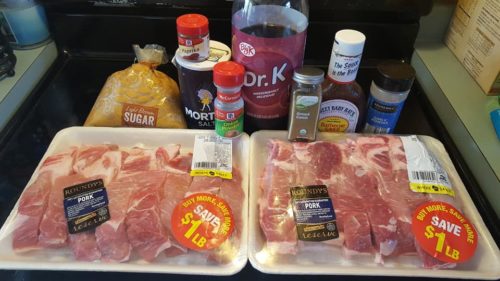
4 lb. Bonless Pork Loin or Shoulder Roast
1 1/2 c. Chicken Broth
2 cloves of garlic minced
Salt & Pepper to Taste

Prepare it:

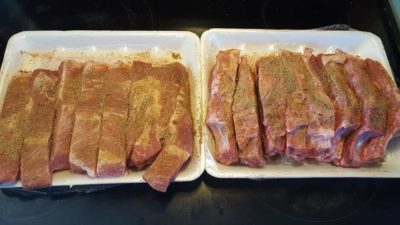
Chunk the pork into 4 equal chunks.  Add chicken broth to bottom of Instant Pot.  Place the pork piece into the pot.  Season liberally with Salt & Pepper and top with minced garlic.  Seal lid on cooker and set timer for manual high pressure at 60 minutes.

Once it is done cooking, allow it to naturally release pressure for 10-15 minutes and then finish releasing manually.  Your pork is now fork tender and ready to be shredded.  Remove as much fat as you can from the cooked meat and shred.

TIME SAVER TIP:  Using a stand mixer with the paddle attachment -`  Place cooked meat in the mixer bowl and starting on low, shred for a few moments and increase speed for about 30 seconds.

Serve pulled pork with a veggie/salad and rice, pasta or beans for meal #1.

Store left over pork in fridge with some of the broth from the instant pot cooking liquid!  You can freeze the leftover meat in ziptop bags, for making meals later.  I love having cooked meat in the freeze for last minute meals or unexpected dinner guests!

Meal #2

BBQ Pulled Pork Pizza

Prepared Pizza Crust (or use homemade)
1/2 c. alfredo sauce or ranch dressing
1 c. BBQ sauce – whatever is your favorite (no need to measure, just as much as you like really!!)
2 c. pulled pork
2 c. shredded cheese (I used mozzarella and cheddar jack, but ANYTHING works!)

Prepare it:

Preheat your oven per the crust directions.  Par bake it for 5 minutes & remove from oven.  Mix the alfredo sauce and 1/4 c. of BBQ sauce.  Spread over pizza crust.  Crumble pulled pork over pizza crust.  Drizzle BBQ sauce over the meat.  Top with shredded cheese and drizzle more BBQ on top.  Bake for 10 minutes until cheese is melted and bubbling.  Allow to cool and serve!

Meal #3

Pork Fried Rice:

1 1/2 c. White Rice – cooked according to package directions
1 c. pulled pork
1 c. diced carrots
1 minced onion
1 c. diced celery
2 cloves minced garlic
1 T. sesame Oil
1/4 c. soy sauce
2 eggs – lightly beaten

Saute onion, carrots & celery in sesame oil in a LARGE skillet over medium/low heat.  Cook just until tender.  Add garlic and saute a few more minutes.  Toss in pork.  Add soy sauce and rice.  Stir to coat rice.  Push rice to one side of the skillet.  Pour eggs in and scramble quickly.  Mix together.  Serve with egg rolls if desired!

Meal #4


Pork Nachos

Tortilla Chips
2 c. Pulled Pork
Taco Seasoning
Nacho Cheese
Grated Cheese
Salsa, Sour Cream, Lettuce, Tomatoes, Olives, Jalapenos, etc. as preferred

Prepare it:

Cook Pork with taco seasoning as directed on package. Serve over chips with desired toppings.

Super Saver Tip: Add a can of beans to your meat to stretch the quantity even further!

Meal #5

BBQ Pork Bowls

Left Over Pork
Your Favorite BBQ Sauce in a bottle
Mashed Potatoes
2 c. milk (whole is best – but please, nothing less than 2%!)
2 T. Butter
2 T. Flour
Salt & Pepper to Taste

Prepare it:

In a skillet – warm the pork with your favorite BBQ.  Heat very low and stir often.  Meanwhile, prepare mashed potatoes as desired.

Using a small pot, melt the butter over medium low heat.  Add the flour and stir constantly.  Cook 5 minutes stirring often while the flour is cooked.  Using a wisk, slowly add the milk to flour & butter mixture and keep stirring it to prevent clumps.  Heat over medium low to a boil.  Once it has thickened and boiled, add salt & pepper to taste.

To serve:

Layer mashed potatoes, pork & gravy in a bowl.  Enjoy!

Time Saver Tip: There are very good ‘country gravy’ mixes available in the spice and prepared meals aisles.  Usually they cost about a dollar. Following the very simply directions on the packet works fast, tastes great, and saves a lot of time compared to making homemade white gravy!

Filed Under: Featured, Recipes, Uncategorized

Breakfast Taco Casserole Recipe

November 16, 2017 By carry Leave a Comment

Breakfast Taco Casserole Recipe

After having an AMAZING Mexican Omelette at a diner recently, I needed to find a way to recreate those flavors at home.  Using left over taco meat and a few items I had on hand, I think I nailed the taste and textures SPOT ON.  My family loved this easy to whip up combination of taco meat, hash browns and eggs!

📌 Pin HERE for later!

Ingredients:

  • Leftover Taco Meat
  • Shredded Hashbrowns
  • Salsa – any brand or heat level
  • 1 Green Pepper
  • 1/4 of a large Sweet Onion
  • 12 Eggs
  • 8 oz Shredded Cheddar Cheese
  • 1/4 Cup Milk
  • Butter

Directions:

Grease a 7 x 11 or similar casserole dish and preheat your oven to 350 Degrees.

Clean and chop 1 green pepper and about 1/4 of a large sweet onion.

Fry your hashbrowns with just a bit of butter (about ten minutes) Do not worry about getting them browned, you just want to soften them. Once done, press them in the bottom of your casserole dish.

Throw your leftover taco meat with the onion and green pepper in the frying pan and fry for about five minutes. Just enough to heat up the meat and soften up your onions and green peppers. Now spread this in your casserole dish over your hashbrowns.

Spread a layer of salsa (add as much as you like!) over the hamburger mixture

In a mixing bowl beat eggs, milk, & a pinch of salt and pepper to taste. Once beaten well, pour over your layers in the casserole dish. I took a fork and poked it down around the casserole and pulled the edges away a bit so the egg soaked down. (Do not worry if your salsa is floating up a bit, it probably will)

Bake for 30 to 40 minutes or until the egg is set and firm in the middle, then remove put shredded cheese over the top, and let sit for 10 minutes.

Enjoy with some more salsa on top and a big dollop of sour cream! YUMMY!


Filed Under: Featured, Recipes, This & That

Starbucks: Zombie Frappuccino – Are you ready?

October 25, 2017 By carry Leave a Comment

Update: Thursday, 10/26… I got it…. I actually like it! Green Apple and Berry flavor, Not to sweet or to sour!

Starbucks: Zombie Frappuccino – Are you ready?

Wednesday, October 25th

Yup, it is that time of year! Time for Starbucks ever so popular Halloween themed Frapp!  Rumor has it, this years drink on their “secret menu” from October 26th to October 31st will be the Zombie Frappuccino.

Starbucks has not “officially” announced this new spooky drink, but I expect they will be anytime now!

The secret mixture is rumored to consist of a Green Caramel Apple flavored powder, a pink powder (most likely sour?), pink “brains” whipped cream, and a pink mocha drizzle.

Chances are this will be as popular as the “Unicorn” drink we saw this Summer, so ingredients for this drink may run out fast! Of course call your local store to confirm they have this drink starting Thursday, October 26th before you head out to give it a try!

Filed Under: Coupons, Featured, Uncategorized

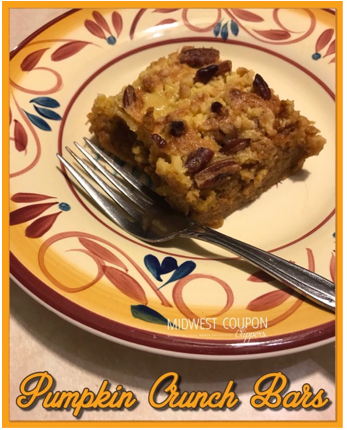
Pumpkin Crunch Bars

October 23, 2017 By Leah Leave a Comment

Pumpkin Crunch Bars

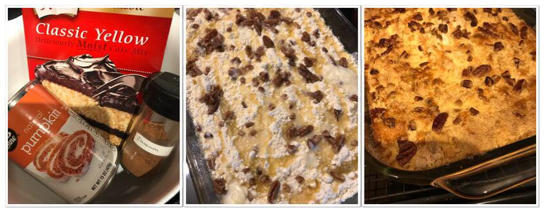
Start with canned pumpkin and a box cake mix and end up with a delicious, rich dessert very similar to a pumpkin pie!  One of my favorite goodies of the season is a slice of pumpkin pie.  This poses a problem as I am not a skilled pastry chef and honestly, pie crust scares me!  Too many variables and the mess of rolling it out, nope, I just can’t bring myself to deal with it!

This EASY recipe mirrors the perfect pumpkin custard in a pie without the worry of a pastry crust!  Plus, the topping is ONLY 2 ingredients! How amazing is that?!

📍Pin it HERE for later!

Ingredients:

  • 1 – 15 oz. can pumpkin puree
  • 1 – 12 oz. can evaporated milk
  • 1 1/2 c. sugar
  • 3 eggs
  • 1 t. cinnamon
  • 1/4 t. nutmeg
  • 1/4 t. allspice
  • 1/4 t. salt
  • 1 yellow cake mix
  • 1 stick butter, melted
  • 1 c. pecan or walnuts (totally optional!)

Lets make it:

Preheat oven to 350°.  Grease a 9×13 pan.  Mix all ingredients except cake mix, butter & nuts.  Once smooth, pour into prepared pan.  Sprinkle the cake mix over the top.  Top with nuts if using.  Carefully drizzle the butter over the top.  It is okay if it isn’t all covered completely with butter.  Bake 45 minutes to 1 hour until set and browned.  A knife will come out clean.  Allow to cool and serve with a dollop of whip cream if desired!

Filed Under: Featured, Instagram, Recipes, This & That

Easy Halloween Monster Krispy Treats & Pretzel Eye Balls, Pumpkins & Ghosts!

October 20, 2017 By Leah Leave a Comment

Easy Halloween Monster Krispy Treats & Pretzel Eye Balls, Pumpkins & Ghosts!

Create super easy and fun Halloween treats using colored melting chocolates and sprinkles!  These come together in MINUTES and look adorable & festive on a tray.

📌 Pin HERE for later!

Monster Krispy Treats

  • Prepared Rice Krispy Treats Cut into rectangles.  Go ahead and cheat here – purchase some store bought ones!
  • Various Colored Melting Chocolate Wafers.  I prefer the Wilton brand.
  • Eye Ball Decorating Candies in different Sizes

Melt the wafers according to package directions.  Dip the Krispy Treats halfway into the chocolate.  Decorate each with the eye ball candies.  Mix and match the sizes and layout.  There is no exact science and just have fun!  Allow to set.

Eye Ball Pretzels

  • Ring Pretzels
  • White Melting Chocolate Wafers
  • Red Sanding Sugar
  • M&M Candies
  • Black Frosting or Melting Chocolate

Line a baking sheet with the pretzel rings.  Put a white wafer inside each.  Preheat oven to 250º – and shut it off.  Place sheet in oven for 3-5 minutes until melted.  Remove from oven and sprinkle a bit of Red Sanding Sugar on each ‘eye ball’.  Top each one with a M&M.  Once set, dot the top of each M&M with the frosting or Black melted chocolate to create a pupil. Allow to set.

Pumpkin Pretzels

  • Mini Twist Pretzels
  • Orange Melting Wafers
  • Green M&Ms, Jimmy Sprinkles or similar for a ‘stem’

Melt the orange wafers according to package directions.  Dip each pretzel in the chocolate and place a green candy at the top.  Allow to set.

Ghost Pretzels

  • Mini Twist Pretzels
  • White Chocolate, Almond Bark or Melting Wafers
  • Small Eye Ball Candy Decorators

Melt white chocolate according to package directions. Dip each pretzel into chocolate.  Add 2 eye balls at the top and allow to set.

💰 Super saver tip 💰:   Shop holiday clearance and grab decorative sprinkles marked down.  Craft stores like JoAnn Fabrics & Michaels are great places to look!  Dip pretzel rods in melted chocolate and add some fun seasonal sprinkles & instantly dress up your table with fun themed snacks for pennies!


Filed Under: Featured, Recipes, This & That

NO McDonalds Szechuan Sauce for you! (or you, or you, or you!) Marketing disaster, or a genius plan? #szechuansauce

October 7, 2017 By carry Leave a Comment

NO McDonalds Szechuan Sauce for you!
(or you, or you, or you!)

Marketing disaster, or a genius plan?


Today at about 10am my son came in my office by me and said he had to go to McDonalds 30 minutes away to get a limited addition Szechuan Sauce at 2pm.

Now first let me explain, my son is not a big fan of McDonalds, and if he does eat there, it is only when they bring back their McRib once a year, so I was very puzzled by him saying this which I am sure he could tell by the look I gave him followed by “The what sauce?” He then goes into this big explanation about a sauce McDonald’s had back when the Disney Mulan Movie was released in 1998. (mind you he would have been FIVE YEARS OLD, so now I am even more confused) He goes on to explain and starts talking about someone named “Rick & Morty.” At this point I am looking into the other room to see where exactly my husband is because I am thinking our son has completely lost his mind.

Oh… Did I mention, Yup, you guessed it… He is a Millennial.

So let me explain to you what I finally found out, after his father “translating” it to me.

There is a popular adult cartoon show on Cartoon Networks Adult Swim called “Rick & Morty” which is about a mad scientist named Rick who takes his Grandson Morty on crazy adventures around the Universe. In the recent Season 3 premiere of the show, it is all about finding the elusive “Szechuan Sauce.” which prompted a petition to be circulated after a tweet that over 44,000 fans signed asking McDonalds to bring back this sauce so they could try it. Which brings us to today…..

McDonalds responded with buttermilkcrispytenders.com. The sauce would return to select stores in limited amounts, at 2 p.m. on Saturday, October 7th. And as you can see on their website, it would be VERY LIMITED, they put….. “And when we say limited, we mean really, really limited!”

Lucky me, a store 30 minutes away was going to have this and my husband and son both wanted to go (note sarcasm).  Now, I did not have to go, but I had some places to stop at in this city anyways, so I might as well go along instead of making a special trip next week.

12:30pm, We head out of town, get to the McDonalds at about 1 p.m. and the parking lot is PACKED! Yup, I will just wait in the car!

5 minutes later my cell phone is ringing which is followed by “Mom, they do not have any sauce, just posters but we are going to wait!” I think to myself “That is odd, I even looked at the website and it said they would have it, how do they not have any?” After then going to McDonalds facebook page and twitter to double check what was going on, come to find out myself and many others nationwide did not read the fine print which read “Each McDonald’s in the location finder will give away limited-edition posters and stickers, while supplies last; only the McDonald’s locations labeled “Szechuan Available” will be giving away Szechuan Sauce, while supplies last”

Needless to say, A LOT of upset customers, some who had been waiting hours and hours to get this “Amazing Sauce.”

A half hour later my son and husband return to the car, neither have a poster (it is being reported on facebook and twitter most locations only got 10 posters) But they did each buy a 4 pack of the buttermilk crispy tenders which were rather tasty, along with a sticker (photo below) and a coupon for a free 4 piece tenders.

They were both a little disappointed, but after some further  investigating, I am seeing at many locations that were actually suppose to have sauce none was available, and for locations that did have the sauce, they were only shipped 20 of them. 10? Really? Most stores had 100 plus eager patrons standing in line.

Right now Social media is a buzz with “McDonalds Fail” and their marketing planning, But the more and more I think about it…. Was it a fail on their part? Talk of their “Szechuan Sauce” is going on all over including many top newspapers writing articles about it. Hashtag #szechuansauce is buzzing right now, and many of us in the U.S. who had no idea what this sauce was all about, now are hearing about it, and even I want to try it after seeing the demand for it!

Isn’t the saying “Even bad publicity is good publicity.”

So I wonder… in a few months, to “make up” for todays fail, Will McDonalds do a nationwide release of this sauce? I guess only time will tell, but I could definitely see this being one of the best marketing campaigns of all time!


Filed Under: Featured, Uncategorized

Homemade Play Dough

August 24, 2017 By Leah Leave a Comment

Homemade Play Dough


When the supply list came home for back to school and it said Play Doh (homemade is preferred) I had a moment of panic.  Homemade Play Dough? Really, that doesn’t sound like something I should attempt.  Well, after scouring the internet and reading blogs and reviews, I put on my Pinterest Mom Pants and went for it! … and guess what?  IT’S EASY, turns out PERFECT, and uses pantry staple ingredients!

What you need:

  • 1 c. flour
  • 1/2 c. salt
  • 2 teaspoons cream of tartar
  • 1 teaspoon cooking oil (canola or vegetable)
  • 1 cup cold water
  • Food coloring as desired
  • Latex gloves (if you don’t want food colored finger nails!)


Now, lets make some play dough

In a medium sauce pan, mix everything except food coloring.  Cook over medium low heat, stirring constantly for 3-5 minutes or until mixture pulls away from the sides of the pan. Once it starts to thicken, you will want to switch from a whisk to a wooden spoon.  It will be MUCH easier to move around the pan!  The dough will have the consistency of mashed potatoes and become very hard to stir.  Make sure it is stiff and set.

Remove from the heat and turn out to a clean, dry surface.  Allow to cool for 1 minute.  At this point, I would recommend throwing the gloves on to keep those hands clean and dye free!  Add food coloring to tint as desired.  To attain a rich deep color I suggest a good quality gel food color.  Don’t be afraid to add a lot.  It will take more than you think to get a vibrant color.  Knead the coloring into the dough for several minutes to distribute color and cool dough.

Allow dough to completely cool, uncovered, for an hour.  Knead occasionally to keep it from drying out on the surface.  Store in an air tight container.

While the ingredients are non-toxic, given the high salt content, please do not eat the dough!

📌 Pin HERE for later!


Filed Under: Family Savings, Featured, Fun for the Family, Recipes, This & That, Uncategorized

Luuup 3 Sifting Tray Litter System B2G1 FREE

June 9, 2017 By Leah Leave a Comment

Disclaimer: This post may contain affiliate links. You can view MCC’s Full Disclosure Policy HERE.

If you like Shopping Online, Join our Deals Group on Facebook HERE!

Luuup 3 Sifting Tray Litter System B2G1 FREE

Toss your scoop and ditch your litter liner. Meet the only litter box you’ll want to come home to.  Luuup is more than a litter box. It’s functional and stylish.  Grab these innovative litter boxes for $49.95 OR Buy 2 and get 1 FREE!   That is 3 complete litter box sets for $99 & FREE shipping.  View in depth instruction on this litter box works HERE.


Filed Under: Featured, Instagram, Online Deals, Pets

Lumber Jack Birthday Party

June 9, 2017 By Leah Leave a Comment

Lumber Jack Birthday Party

When your son asks for a ‘sawmill’ birthday party you stop and ponder how does one make that happen? I knew there was no way to make a physical ‘sawmill’ cake for him!  So after a little searching around we settled for a more streamlined Lumber Jack Theme!  A few easy treats and toys we had already made for an adorable tablescape!

The CAKE – a Tree Stump!

I baked 2 round cakes and stacked them on a cake tray.  For the frosting you can use a store bought or homemade buttercream.  For this, I made a classic buttercream.  Once mixed, I removed a few cups and added a sprinkle of cocoa powder to tint it slightly tan.  Then added more cocoa powder to the rest and some brown food color to get deep brown bark color.

For decorating:

Fill a piping bag or ziptop bag with the dark brown frosting and snip a small opening.  Making straight lines up and down cover the entire cake.  Neatness doesn’t matter and it doesn’t have to be exact. Just get that tree stump covered in bark! Then make a circle around the top, outer edge of the cake.  Let frosting set and slightly dry for about 20 minutes.  Using a flat edge (knife, narrow spatula or flat pastry spreader) press the frosting upwards to give a pattern of bark, slightly overlapping each pass. Again, neatness isn’t required and there is no exact science! You cannot mess this up.  For the top, simply fill another piping bag with the lighter frosting.  Swirl in circles and create a ‘growth ring’ like pattern.

The SNACKS!

Birch Logs: 

Dip pretzel rods in white melting chocolate.  Drizzle with dark chocolate or black melting wafers to create the ‘birch tree’ look.

Acorns:

Using the melting chocolate from the logs above put a small dab on Hershey’s Kisses & press onto Vanilla Wafers. Top with a butterscotch or peanut butter chip using the same melted chocolate.

Evergreen Trees:

Melt green melting wafers and put in a piping bag or ziptop bag.  Lay pretzel sticks on parchment paper and carefully drizzle the chocolate side to side into a free form tree shape over the sticks.

Fire Wood For Sale:

Pretzel Nuggets in a bowl

Wood Chips:

Mini Marshmallows, Mini Chocolate Chips, and Granola in bowl

To finish out the table, I added a log hauling truck we had, plus a few chain saw toys, logs, and photo props to add to the fun.  Plus we used red balloons, bowls and plates over a black table cloth bringing the lumber jack ‘flannel’ into the party.


📍 Pin HERE


Filed Under: Baby, Featured, Miscellaneous, Recipes, This & That

No Melt ‘Ice Cream’ Cones

May 5, 2017 By carry Leave a Comment

My challenge was to make “Ice Cream Cone Treats” for a bake sale. I wanted to do the cupcake ones in the cones, but they tend to get soggy.  Plus, I would have had to make them the night before, so it would have been worse.  Instead, we did a spin on them with things I had in the cupboard! After making these with my son and seeing how much fun we had, I think it would be a GREAT idea to make at a birthday or slumber party. 📌 Pin it HERE for use later!

No Melt ‘Ice Cream’ Cones

Ingredients:

  • Sugar Cones
  • Camp size marshmallows (the big ones)
  • Melting Chocolate Wafers (any colors) or chocolate chips, white chocolate chips, almond bark, butterscotch chips)
  • Sprinkles
  • Red Candy – we used bite size Twizzlers, but could use a red gum drop, red M&M’s, red Sixlets, etc.
  • Disposable aluminum cake or lasagna sized pan

Directions:

  • Cut the top & bottom of the marshmallow around the edge so it will fit in the cone, but tight enough so that you still have to stuff it just a bit that is will stay stuck in the cone. This will be your ice cream! We also cut around the top with a kitchen sheers so it had more of an ice cream scoop look! If it requires too much stuffing, cut off a little bit more so it doesn’t break your cone (we lost 2 cones from over stuffing, but no complaints, they were a nice snack ).
  • Carefully melt your chocolate over a double boiler  or in the microwave.  Dunk your ice cream (marshmallow) in the melted chocolate of your choice! We used what we had on hand, but any color chocolate would be fun!

  • Roll in sprinkles! (hey, NOT YOU, the “ice cream” scoop. Though rolling around in sprinkles I may have to add to my bucket list, that just sounds like fun!)
  • Put a spoonful chocolate melted chips on top of the cone (milk, semi-sweet, dark – as long as it’s brown). This is your hot fudge!
  • Top with your red candy to look like a cherry!

  • To set, I put holes in an aluminum foil pan to hold them (and also used some of our water bottles that had small top openings and some wine glasses, I have plenty of those in the kitchen).
  • I picked up the clear treat bags at the Dollar Tree and individually wrapped each cone!

Here is our final product. Simple to do and they taste OH SO YUMMY!

This fun little project was written by a dear friend and Midwest Coupon Clippers follower Brooke. A huge thanks to her and cute little Tucker for their continued help thru the years.

📌 Pin it HERE for use later!


Filed Under: Featured, Instagram, Recipes, Uncategorized

  • « Previous Page
  • 1
  • …
  • 497
  • 498
  • 499
  • 500
  • 501
  • Next Page »

{ Your info will never be shared because spam stinks }

Archives

Deals

Disney Princess Styling Heads ONLY $5.59

Today Only! 40% Off Matching Pajamas For All – Includes Grinch Styles!

Today Only! 40% OFF Craft Toys & Activity Kits

200 Count Paper Napkins ONLY $1.99 (Limit 3) Reg. $3.49

Clearance BLOWOUT! Additional 50% off

More Deals

Coupons

75% Off! 5×7 or 8×10 Wood Panel Photo Prints

Hellmann’s (Unilever) Sign UP Rewards! $5 towards your next purchase + Get exclusive details about new products, recipes & savings

Kohl’s Last Minute Gift Sale – Valid thru 12/24

EXCLUSIVE OFFERS: Additional 10% off ALL these sale prices!

Have you tried Mike’s Popcorn? If not, you are MISSING OUT!

More Coupon Posts

Sweeps & Giveaways

Merry Christmas Giveaway – 2 Hatchimals & One Nintendo NES

Win A Zoo Pass From Zoological Society Of Milwaukee!

Culver’s Cow Tippin’ Instant Win Game!

WIN a Dream Vacation from Club Med!

WIN a Trip to the Indy 500 from Craftsman (2 Tickets, Airfare, and Hotel Included)

More Sweeps & Giveaways

Copyright ©2025, Midwest Coupon Clippers. All Rights Reserved. Site by Pixel Me Designs